Showing posts with label Light and Easy. Show all posts

Wednesday, July 23, 2014

Key Lime Pie


There are a couple of foods and flavors that scream for their season. Winter you have cranberries, peppermint, soups and roasts. Spring brings florals, rosemary, thyme, lavender, deviled eggs. And Fall smells of cinnamon, corny dogs (You texans know what I mean), and buffalo wings for those college football watching Saturdays. Typically, I'd tell you the fall is my favorite season of the year. BUT my favorite cooking season would have to be the summer. Summer flavors like citrus, grilled steaks and fish, salads with fresh berries...the list goes on. I just love it.

Today I'm going to focus on the citrus, I can't remember the last time I let a summer go by without making a batch of lemon bars and a key lime pie....usually several. It's just so light and refreshing yet tangy and delicious! It's also a pretty easy flavor to work with and goes well with just about everything. I highly recommend the meyer lemon olive oil that O Olive Oil Company  makes. I use lemon on chicken, when i bake shrimp, in my butter that goes with crab legs, in cupcakes, in buttercream. Everywhere! And the same can be said with limes. Limes also go great with jalapenos. The multitude of combinations you can do with these two fruits is ridonkulous. Which is why I enjoy cooking in the summer so much!

Unfortunately there are a lot of reasons I have slowed down my cooking this season, but this weekend I said enough is enough and set out to make my pie.

Key Lime Pie is one of the easiest pies you can make. People pretty consistently tell me that what I think is easy is not easy for everyone else. That may be true from time to time.  But I try to share recipes that the average cook can make. Otherwise what fun is it to share them?

Pies are tricky and what is tricky about them is typically the crust. Especially when making one from scratch. With this recipe it is extremely hard to mess up the crust! And there is no crust on top which makes it even easier to deal with.

This is a recipe I found on Sweet Pea's Kitchen, but I have changed the proportions and added some vanilla. I prefer a thick layers of each level: the crust, filling, and topping. I think I'd even go larger than what I did this weekend. But it's up to you! I also used actual key limes from the grocery store where as Sweet Pea used limes. The first time I used it i used regular limes and it worked just fine. You have to use A LOT of key limes to get the required juice amount, so it just depends on how hard you want to work ;)

Key Lime Pie
Ingredients:
  •   8 tsp. Lime Zest
  •   1 C. Lime juice*
  •   8 Large egg yolks**
  •   2 (14 oz.) cans of Sweetened Condensed Milk
  •   18 Honey Graham Crackers
  •   4 Tbsp. Sugar
  •   10 Tbsp. Unsalted Butter, melted
  •   1 1/2 C. Heavy Whipping Cream
  •   1/2 C. Confectioner's Sugar
  •   2 tsp. Vanilla Extract
  •   1/2 lime thinly sliced + sugar for garnish (optional)
* 6-7 Large Limes OR a whole bag of key limes
**If you don't know how to separate the eggs and yolks send me a message! But I save the whites for egg white omelets the next morning :)

How to do it:

Step 1: Whisk together your zest and egg yolks. The mixture will turn a little green and that's ok! Add the sweetened milk and whisk until combined. Then do the same with the lime juice. Put the bowl to the side and let your mixture sit at room temperature for about 30 minutes. This will allow your mixture to thicken. You don't need to touch it! It will do it all by itself.

Step 2: Start on your crust! Preheat the oven to 325 degrees. Most pies cook best if you move your rack to the center of your oven. Use a food processor to grind the graham crackers into find pieces. Add your 4 TBSP of sugar and pulsate just until combined. Then pour your crumbs into a small bowl. Add your melted butter and mix until combined. I use my hands to make sure everything gets really evenly spread out. 

Step 3: Move your crumbs to the pie plate. Using your hands press the crumbs into the plate until evenly distributed. And don't forget to go up the sides! The crumbs tend to group together in the middle of your plate, so be sure to really work them out to the sides. 

Step 4: Bake the crust for about 20 minutes. Your oven should smell fantastic and the crust should be browning just a little. (this is hard to tell because the graham crackers are already brown!) I do it mostly based on smell. This doesn't matter too too much as the crust will continue to cook when you put it back in with the filling. That being said don't skip it!

Step 5: Pour your newly thickened filing into the crust and bake for 22-25 minutes. Gently jiggle the pie. You want the filling to be firm but still have a little bit of jiggle. If it's moving around too much it's not set enough and you need to leave it in a little longer. 

Step 6: Cool on a wire rack for 10 minutes and then chill in your refrigerator for 3 hours. DO NOT put the cream on until it is cooled, or else it will just melt.

Step 7: While your pie is chilling you can start the whipped cream. Pour your heavy whipping cream into a bowl with your mixer. Beat on a HIGH speed until soft peaks form. (It will look like nothing is happening for a little while and then like magic it starts thickening. Quickly stick your finger in and pull it out. You should see a little tiny peak appear). Once you have soft peaks add your confectioner's sugar just a little at a time and your vanilla. Beat until you get stiff peaks! (Ones that keep their peak shape after you pull your finger out). 

Step 8: Use a spatula or icing knife to spread your whipped cream over the cake. If you want to use the garnish. take your thinly sliced lime and coat it in your sugar. You can cut a small slit and twist them, put whole slices on your cake, or do halves like I did. 

Happy Eating! 

xoxo
Tanner 

Monday, February 17, 2014

Stuffed Peppers


It is GORGEOUS outside here in Texas and makes me think that pesky groundhog was wrong about six more weeks of winter. With excitement for spring but the threat of more snowy and cold days ahead I wanted to post a recipe that kind of covers both.

These stuffed peppers are a recipe that I have adapted from Kayln's Kitchen. It's really wintery comfort food that is still on the lighter side. They have proved to be a very popular and easy weeknight meal over at my house. My dad has requested them multiple times. If you know my dad that truly speaks to their quality. He will eat everything but never seems to really "like" anything!

So one of the best things about this recipe is it's flexibility. You can really customize it to meet your family's tastes. You could substitute italian sausage for turkey sausage, ground beef with taco seasoning, or even just chicken you pull off a rotissiere chicken. Don't like corn? No problem just switch out the vegetables however you like! Experimenting with the flavors is half of the fun.

I've also been testing out different flavored olive oils. And it's amazing how it can impact the flavor of your dish. So far my favorites have come from O Olive Oil in California. They have been on my favorite "bargain" shopping website Ruelala a bunch, so I have been able to try quite a few of the flavors for a heavily reduced price. My personal favorites are the Jalapeno Lime and the Fresh Basil (I use this when making my Pasta Sauce recipe!. But there are several to choose from.

Another way to mess with this recipe is the type of rice you use. I use pearled cous cous, Kalyn's Kitchen uses brown rice, but you could really use any. I bet Zattarain's boxed Spanish Rice would taste pretty good as well.

If you mix up the recipe let me know some of the variations you try! I'd love to have a running list of great variations so that I can mix it up. If certain flavors work well for you feel free to post them in the comment section so everyone can benefit!

Stuffed Peppers

                   Ingredients

                  1 Box of Pearled Cous Cous
            4 Large Bell Peppers, any color
            1 Large Onion, Diced
            Olive Oil
            1 Lb. Spicy Italian Sausage
            Oregano
            1/2 Bag of Frozen Corn
            3 Green Onions, diced
            Parmesan Cheese
            Salt and pepper to taste 
            Panko Bread Crumbs
            2 tbsp. Butter
            Cabbage

Step 1: Chop the tops off of the peppers and pull out the seed balls. You can use a knife to carefully shave the bottom of the peppers so they will stand up. Cut is much as you can off of the discarded pepper tops and chop it up to use in your stuffing mixture.
Step 2: Cook to CousCous according to the packages instructions.

Step 3: Preheat your oven to 375 degrees. While your Cous Cous is cooking. Dice the onion. Heat the olive oil in a frying pan with high sides. (don't have one? a sauce pan works ok too!). Add the onion, green onion, diced peppers, corn, and oregano  to taste until soft and fragrant. 
Step 4: Remove the vegetable mixture and pour into a bowl and set aside. Using the same pan heat a tad more olive oil and cook the sausage until browned. Then add the vegetable mixture back into the pan and sautee for about 3-5 minutes to blend the flavors. Add salt and pepper to taste. 
Step 5: Mix in about 1/3 C. of parmesan into the mixture until melted.
Step 6: Line your pan with a very thin layer of olive oil. Stuff each pepper with the mixture and set into your pan. Mix 1/2 C. of parmesan and 1/2 C. of Panko bread crumbs together in a small bowl. Pour on top of your peppers. (and by pour i mean use your hands to create a thin layer of it over the peppers). Bake the peppers for about 20 minutes or until the pepper is soft and the tops are turning brown and crispy.
Step 7: If you have extra stuffing you can cook it in it's own dish with panko and parmesan on top. I love eating it for breakfast!
Step 8: While your peppers are cooking. Use the same pan to melt 2 Tbsp. of butter. Saute the cabbage until soft and slightly wilted. Season with Salt and Pepper.
Step 9: When everything is done make a bed of cabbage on your plates and lay the pepper on top and enjoy!

It may seem like there are a lot of steps, but there really isn't and it's fairly easy. If you do the chopping up front it will save you a lot of time as you work through the recipe. I hope you enjoy it, it's one of my new favorite recipes!

Happy Eating!

Tanner

Wednesday, November 20, 2013

Beb's Banana Pudding

I never know how to feel on Hayden's birthday. Should I be sad? Should I celebrate? Should I ignore it? It's the second hardest day of the year for me. I want to be happy and celebrate it but it's hard to ignore the lingering and nagging grief and sadness, She should be the one celebrating not me. But in true Hayden fashion I'm sure she is at the beach somewhere getting a super dark tan and reading the flood of Facebook messages that are finally all about her ;).

I really embraced cooking after she died. It was an outlet, I didn't have to think. But most importantly the smells and the food itself were so comforting. Pasta's, cupcakes, popcorns...all that stuff that is so bad for you but warms your heart and reminds you of home all at the same time. I've often thought about writing a book about cooking through grief and how it helped me get by. As tragic as this situation has been and still is, the silver lining was that I found a love for cooking and sharing that with all of you.

Today I have really loved seeing everyone remembering, wearing purple or pieces of her clothing, eating her favorite foods. So it's only appropriate to share a recipe for one of her all time favorite foods...Banana Pudding.

 
First, you need a little back story on this gem of a snack. I guess it all goes back to Black Eyed Pea. We had one down the street and frequently ate there as a family. I don't think anyone ever ate their meals especially not the vegetables, but we certainly ate that banana pudding. It was a moment where all four of us could come together and appreciate something (that doesn't happen often). This period was follwed by a lull in banana pudding eating. Not to worry though, we more than made up for lost time when Hayden moved up to New York with me. I had discovered that Magnolia Bakery offered a $45 dollar tub...yes a large TUB of banana pudding. I made the mistake of telling Hayden about these heavenly tubs, and soon she was there on a regular basis. She would single handedly devour those tubs. She might have claimed to buy one for her whole apartment, but we all know she would just finish it alone in one sitting. Those expensive tubs brought her so much joy, and brought the rest of us years of laughs with her then and now.

The banana pudding recipe I'm going to share with you is by Paula Deen. Everyone can have their opinion about her, but the lady is a darn good cook. And her banana pudding is absolutely amazing. Lots of southern families have family recipes that have been passed down, but do yourself a favor and give this one a try. It might just become your new favorite and one of the best ways to remember Hayden.

Beb's Banana Pudding

2 bags Pepperidge Farm Chessmen cookies*
6 to 8 bananas, sliced
2 cups milk
1 box instant** French vanilla pudding (5 oz.)
1  package cream cheese (8 oz), softened
1 can sweetened condensed milk (14 oz.)
1  container Cool Whip thawed (12 oz)

*Make sure to get the seasonal ones for Christmas!
**Make sure you get instant! This is essential

Step 1: Use the cookies to line the bottom of a 13 by 9 inch casserole dish, Then make a second layer with the sliced bananas.


Step 2: Blend the milk and pudding mix with an electric mixer. In a separate bowl, mix the cream cheese and condensed milk together until smooth. (DON'T CHEAT! Make sure it's smooth). Gently add the cool whip into the cream cheese mixture and then add to the pudding mixture. Stir until completely blended.

Step 3: Pour the mixture over the cookies and bananas. Then top it off with a final layer of cookies.
 
Step 4: Refrigerate! You could eat it right away but I suggest refrigerating for 1-2 hours so it gets nice and cool. The way banana pudding should be eaten.
 
I hope you like this recipe as much as I do. It has become a staple in my recipe arsenal, and it is a quick and easy dish to bring to any get together or party you may have especially during this hectic holiday season. 

Happy Eating and lots of love to HH today. Happy Birthday Beb, we all love you very much
xoxo Tanner

Tuesday, November 19, 2013

Applesauce: an easy and moderately healthy fall must

I know I took a pretty long break from blogging, but that's what happens when graduation, moot court, bar studying, travels, and life gets in the way. Hopefully now that I have to be a grown up with a real work schedule I'll get to blog a lot more. People always ask for my recipes and i've made a thousand promises to post them but haven't. My apologies.


TasteAnywho...As a childless adult the last thing I think of when it comes to snack time is applesauce. That's a mistake because as soon as i eat one little spoonful that child inside of me just comes skipping right out. IT IS SO GOOD!!! When and why do we ever stop eating applesauce? Why does it have to be left to the wee ones. Who made that rule because it is bogus. That being said I got this recipe from a mommy blog haha. (recipe is curtesy of mommymakesitbetter.com)

Smell. Homemade applesauce makes your house smell like fall. I didn't even want to turn off my crockpot because I didn't want to make the smell go away. And you still have a week and a half  before we start switching scents to fir trees, fire and snow! Take advantage of it!! But you also don't have to limit this recipe to the fall. It's good all year long :)

Ease. There is literally zero excuse for not trying this. A recipe doesn't get any easier than this. SO TRY IT. If you don't have a crockpot go buy one. Talk about convenience you can do literally anything in that thing. It's worth the whopping $30 you'll spend on one. You could even get one cheaper but I wanted a timer.

Oh and p.s...... it's only 1 a whopping 1 weight watcher point per serving!!


JUST TRY IT!! YOU'LL LOVE IT! :)

Cinnamon Applesauce

8 apples - any type but I like using honey crisp 
1 strip of lemon peel*
1 tsp. fresh lemon juice
2 3in. cinnamon sticks
5 tsp. light brown sugar 

*I skip this because it makes it too lemony and you can't get all the rind out sometimes and I hate the way that tastes.


Step 1: Peel, core and chop the apples. What I do is peel it (I attempt to do it in one string it doesn't happen often. You can use a veggie peeler) then I make a square around the core cutting off the sides and then I chop those large pieces.
Step 2: Toss them in the crock pot and add the rest of the ingredients

Step 3: Set your crock pot to low and cook for 6 hours. 

Step 4: Optional. blend your mixture if you want it super smooth or just use a whisk to stir and eat it chunky! I then put it in old jars like a pasta sauce jar or a salsa jar that's been thoroughly rinsed out.


AND YOU'RE DONE! Congrats on making the bestest, easiest recipe EVER! Don't be afraid to play with the proportions (adding things or taking things away to get the flavor YOU want) Let me know how it goes! 

xoxo Tanner

Saturday, February 9, 2013

My new favorite weeknight meal: Scallops over wilted spinach and risotto

I never use to be  much of a fish eater. That didn't change 'til I was in college, and now I can't get enough of it. Scallops are really great because if cooked right they don't taste super fishy. I challenge all of you "non-fish eaters" to give these a try. If you don't like them then that's ok maybe you truly just don't like fishy foods, but I realllllllly think most of you will love this recipe. It's SO yummy.

To be fair, nothing in this recipe is super difficult it just takes a lot of time because you have 3 different portions of the meal to prepare. And on top of that I know that the thought of searing scallops will have many of you concerned, but you really shouldn't be. It's much easier than you'd think.

One of the best parts about this meal though is that you don't feel weighted down after eating it even with the risotto! That has become an essential requirement of my weeknight meals. I'd really prefer something lighter but filling during my weeknights, and this recipe fits that bill.

If you have particular questions about searing the scallops let me know! I'd be happy to walk you through the process or even show you if you want.

Scallops, Wilted Spinach, and Parmesan Risotto
Serves about 3 and takes about 40 minutes to make

1 C. Arborio Rice 
(for you Market Street goers, they have some that's "Made in Texas" it was greattt!!!!!)
4 tsp. Butter (separated)
2 Shallots minced (separated)
1/2 C. White Wine
4 C. Low Sodium Chicken Broth
1/4 C. Grated Parmesan Cheese 
(splurge on this a little. Don't use the kraft parmesan in a green bottle)
2 Tbs. Parsley, chopped
16 oz. Jumbo Sea scallops
1 tsp. Olive Oil
10 oz. Baby Spinach Washed

Step 1: Use a medium sauce pan and melt 2 tsp. of the butter on a medium heat. Then saute one shallots just for a minute. Ass the rice and mix until well coated and the rice becomes translucent. 

Step 2: Add the white wine and a dash of salt and pepper. Mix well.


Step 3: Pour 1 cup of the chicken stock and mix until the rice absorbs all of that stock. Continue to add 1 cup of the stock at a time mixing until absorbed each time. (tip! Stir constantly so nothing sticks to the bottom) 

Step 4: when all broth is absorbed add the parmesan and parsley until combined.

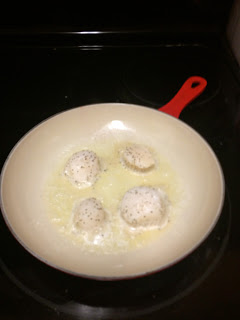
Step 5: (it cuts down on time if you start the next steps simultaneously with the risotto). Wash the scallops, pat them dry with a paper towel and season them with a little salt and pepper on each side. 


Step 6: Melt 1 tsp. of butter and place the scallops in the pan. Leave them alone for a few minutes until the bottom is the pretty light brown color. Then flip them and do the same on the other side. When the sides looks translucent you are good to go. 


Step 7: Using the same pan add the olive oil and the other shallot. Then add the spinach, constantly toss it until it wilts. Season with salt and pepper and you are ready to go.

Step 8: To serve scoop the risotto onto a plate, layer the spinach on top, and then place three scallops on top of that and you are good to go!


Hope you enjoy this delicious meal!

<3 Tan Tan

Sunday, January 20, 2013

Easy Weeknight Dinner: Crab Cakes

This is a little bit of a summery dish, but sometimes in the middle of the cold winter something light and (semi) fresh is just what the doctor ordered. These crab cakes are actually really easy to make. Even using the canned crab they still taste amazing. The seafood selection is not anything to brag about here in Lubbock, but they do have fresh? crab. It's just easier and a huge time saver to buy the canned lump meat. And like I said it taste good. BUTTTTT of course my motto is fresh is best so it's up to you.

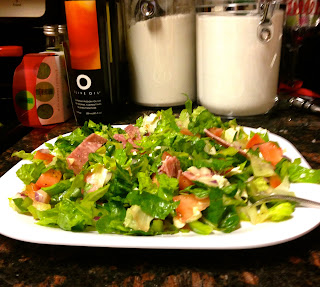
I like to serve these with a salad. I usually just use romaine, green onion, feta, yellow tomatoes, a little salt and pepper and Brianna's Real French Vinaigrette dressing. Let's side bar about that for just a second. My aunt Nancy introduced me to Brianna's. I have tried a couple different ones and I love them all, but the Real French Vinaigrette is her best in my opinion. It's light and delicious and so far out of all the salad's I've made is everyone's favorite dressing. I literally could eat this salad every single day. Annndddd maybe I do, so shoot me :)

Ok but back to the crab cakes. They only take about 20-30 minutes total time in the kitchen, which is awesome!! Especially when there is a ton going on. That kind of time frame makes it so no one has any excuse to heat up a frozen dinner anymore. And 1 serving of this recipe is only 4 weight watcher points!!!!!

Give them a try, you won't be disappointed. And it's SO EASY! They only look hard to make, It's basically just mixing everything together forming little patties and pan frying. It doesn't get too much easier than that.


Crab Cakes
16 oz. "fresh" lump crabmeat, drained
4 large lemons
4 oz. diced pimiento, drained
2 green onions chopped
1 large egg, lightly beaten
2 Tbsp. mayonnaise (less WW points if you use the light kind!)
1 tsp. Old Bay seasoning
2 tsp. Dijon Mustard
1 cup pank bread crumbs
Canola Oil

Step 1: Forge through the crabmeat and make sure that no pieces of the shell got left behind. It's not that big of a deal if you miss one though

Step 2: Zest the lemons and cut them in half. Juice the lemons so you get 1/4 of a cup, but I just squeeze them right into the mixing bowl. It's up to you! Stir together zest, juice, pimento, onions, egg, mayonnaise, old bay, and mustard. Stir until everything is mixed together completely. Begin mixing in the crab and half of the bread crumbs.

Step 3: Gently form patties from the mixture. You can make them as big or as small as you like, but make sure they are firmly packed so they don't fall apart in the pan. Right before you are ready to put them in the pan coat the patties in the remaining breadcrumbs (you might need a little extra panko for this)

Step 4: The recipe said to cook them in 2 Tbsp. of hot oil in a non stick skillet. I personally think they cook better if you use more oil than that. I make sure the entire pan is covered in the oil and is about an 1/8 of an inch thick. This will mean you may have to drain the pan because any panko that falls off will start to burn. I just think the extra oil makes them cook faster and more evenly without burning, but that's just my experience with them. Cook for 2 minutes on each side or until they turn golden brown in color (you can pretty much eyeball this - does it look cooked? Then it probably is!

Step 5: Drain the Crab cakes on a paper towel to get off the extra grease. 

Serve them with lemon wedges and you are done!!!

Hope you enjoy! <3 tan tan

Friday, January 11, 2013

Quick Lunch: Italian Chopped Salad

New Year's Resolution #4 of 1,000,000. Eat out less and make healthier meals! I know this is always everyone's goal, but I am reallllllly going to try to stick to at least this one out of my bagillion resolutions. We can make excuse after excuse about how there is not enough time to make lunch, or I'll just heat up this frozen meal to save some time or to encourage our laziness. But fast food and even frozen foods are just so TERRIBLE for you. Don't get me wrong I love some McDonald's chicken nuggets every now and then, but one happy meal (you know those things for kids) is 17 weight watcher points. 17!!!!!!! That's 2/3 of my daily allotment. Just start doing a little bit of research, and you can see how much garbage goes into these products. Just knowing that will instantly help you make better choices!

We need to stop making excuses for ourselves and really put in the effort. If you plan your meals on sunday, when there is rarely going anything on anyway you can even make a ton of it ahead of time and be ready to go for the whole week.

This was a pintrest recipe I found, and it was a wonderful wonderful salad! It's 11 WW points per serving, but it's all good points! You could substitute meats or cheeses to minimize those points if you really wanted to. Just in general don't be afraid to play with recipes. I'm definitely guilty of looking at a recipe and saying "Yeah. No thanks!" That's silly. You can almost always substitute ingredients or play with the amounts to get a taste that suits you. In this particular recipe I played with the dressing. I wanted to tone down the red wine vinegar flavor. I added a little more garlic, salt, and pepper until it tasted right for me. You could also just pour in less red wine vinegar (but I didn't know that until it was already made).

One more challenge: FRESH IS BEST!!! Don't be afraid to use fresh vegetables because they go bad, or are more expensive. You can plan your menu around similar ingredients for the week. But either way it's worth it to eat fresh. It's better for you and it tastes better too!

This recipe also makes a ton, so just don't toss it in the dressing and you can have it a couple days in a row. Trust me you won't get tired of it. You'll want it all week!


Italian Chopped Salad
4 Romaine Hearts Diced
2 Roma Tomatoes, Seeded and Diced
1 Green Bell Pepper, Seeded and Diced
1/2 Red Onion, Diced
1/3 C. Kalamata Olives, Pitted and Diced
8 Oz. Fresh Mozzarella
4 Oz. Italian Dry Salami, Chopped
1 Tbs. Fresh Basil
1 Tbs. Fresh Parsley

Herbed Red Wine Vinaigrette
1/4 C. + 2 Tbs. Red Wine Vinegar
2 Garlic Cloves Pressed
1/4 tsp. Dijon Mustard
1/2 tsp. Salt
1/2 tsp. Italian Seasoning
Pinch of Ground Pepper
3/4 tsp. Sugar
1/4 C. + 2 Tbs. Olive Oil

Step 1: To make the salad Just combine all the ingredients!

Step 2: In a separate bowl add all ingredients through sugar and whisk to combine. Slowly add the oil whisking constantly, until combined. (Really give this a little bit of time so the flavors bend well) 

Step 3: Adjust the flavors as needed. (I topped the salad with fresh black pepper and it was amazing)

HOW EASY WAS THAT!!!! Enjoy!