Showing posts with label Entree. Show all posts

Wednesday, April 30, 2014

Grilled Pizzas

You know that time I said I would be better about posting and then wasn't? Yeahhhh...sorry about that. BUT my little weather app tells me this weekend in Dallas is going to be warm and GORGEOUS! Which is hilarious since it was freezing last night. Anyway, this grilled pizza receip is to die for and is a perfect way to kick off the warm (or excruciatingly hot?) season.

When it comes to pizza I will literally eat it all. Lunchable mini pizzas? Duh. Domino's? Check. That new (but i guess really not so new) garlic crust is the bomb. Lover's pizza? Check. Campisi's? Check. Grimaldi's? Double check. There are so many other great pizza places around this city and I'm sure plenty I've never heard of. Union Bear in west village is one of my new favorites and I highly recommend it to anyone.

But with all of these options it's easy to throw away home cooking and my favorite motto of fresh is best.  I know it's pretty hard to get motivated, especially when you have to make some sort of dough. It's time consuming for sure! But it tastes amazing, it's healthier, and it's a good way to get kids, other family members or friends involved in the kitchen.

These little pizzas are also a great idea for a small party or get together. Every time I have made these I've set up a pizza bar and invited friends and family over to dig in. You just need to make a bunch of dough discs and chop up your favorite toppings like pepperoni, sausage, bell pepper, olives, jalapeno's, onions, etc. and let your guests make their own creations. It's great because it can be hard to cater to and please everyone at a party. This way you most definitely don't have to.

Without further ado your recipe! The dough recipe is courtesy of Ina Garten but i changed it up a tad and grilled it instead of putting it in the oven :)

Tan Tan's Grilled Pizzas
 **The dough makes about 4-5 pizzas
 
Dough essentials:
1 1/4 cups warm water
2 packages dry yeast
1 tablespoon honey 
Olive oil*
4+ cups all-purpose flour
Kosher salt
4 cloves garlic, sliced
5 sprigs fresh thyme
1/4 teaspoon crushed red pepper flakes

Toppings
Whatever you want!
4 C. Mozzarella
Mushrooms
Bell Pepper
Pepperoni (I buy from butcher)
Sausage
Jalapeno
Olives
Onions
Pinapple
Ham


*I recommend  O Olive Oil's Roasted Garlic You'll have to order it, but it (and all of the flavors) is amazing!
 
Instructions:

Step 1: Combine the water, yeast, honey and 3 tablespoons of olive oil in a bowl (I use my hands, but if you want use an electric mixer with a dough hook). Allow the yeast to dissolve.
 
Step 2: Add 3 cups of your flour a teaspoon or two of salt and begin mixing. I start with a spoon and as it begins forming into a dough I add 1 more cup of flour and also cover my hands in flour (it helps with the stickyness). Work the dough until it becomes smooth. You can add flour if kneaded (haha get it?)

Step 3: Continue kneading until the dough is elasticy. Then coat your bowl and the dough lightly in olive oil, cover it with a towel, and all the dough to rise for about 30 minutes. No need for a warm location it will be just fine at room temperature.

Step 4: While that is rising you can make your garlic oil that coats your pizzas. Using a small sauce pan add 1/2 C. of olive oil, the garlic, thyme, and red pepper flakes together. Simmer over medium low heat so all of the flavor blends together. Just be sure nothing is burning. Let it sit for roughly 10 minutes.

Step 5: Divide the dough into equal pieces. Cover them with a damp towel and let them for 10 minutes. Then take each piece and stretch it, knead it, flatten it, whatever you need to do to get the dough in the size and shape you want. (this is a great time for kids to get involved).


Step 6: At this point you should do 2 things. Turn on your grill and heat up a fry pan on your stove with a little olive oil. You are about to cook the dough just a tad on the grill and while that is happening you can cook the sausage or soften your vegetables like bell peppers, mushrooms and jalapenos if desired.

Step 7: When your grill is ready to go. Brush ONE side of your pizza with the garlic oil you made earlier. Put that side down on the grill. (the olive oil will help it not stick to the grill). Try not to put it directly over flames if it can be avoided. You only want to let it cook for 5 minutes max. You want the bottom to appear lightly cooked. Then bring the pizzas back inside. Have everyone put their sauce and toppings on the cooked sides of their pizzas. I recommend toppings first then cheese on top. (as it melts the cheese traps the toppings so they don't fall off). Then bring them back out to the grill and cook through! You can gauge it based on the cheese. Once it is done melting start checking the bottoms of your pizza. I typically move mine to the little rack in my grill so it's further away from the heat to allow the dough to cook all the way through.


Then you can enjoy it!

I hope you don't let the fear of dough or the time consumption deter you from trying this recipe, because seriously you won't be disappointed! As always let me know if you have suggestions or if you try it another way! I'm always looking for new variations of my favorite recipes! Have a beautiful weekend!


xoxo & Happy Eating!

Tanner

Monday, February 17, 2014

Stuffed Peppers


It is GORGEOUS outside here in Texas and makes me think that pesky groundhog was wrong about six more weeks of winter. With excitement for spring but the threat of more snowy and cold days ahead I wanted to post a recipe that kind of covers both.

These stuffed peppers are a recipe that I have adapted from Kayln's Kitchen. It's really wintery comfort food that is still on the lighter side. They have proved to be a very popular and easy weeknight meal over at my house. My dad has requested them multiple times. If you know my dad that truly speaks to their quality. He will eat everything but never seems to really "like" anything!

So one of the best things about this recipe is it's flexibility. You can really customize it to meet your family's tastes. You could substitute italian sausage for turkey sausage, ground beef with taco seasoning, or even just chicken you pull off a rotissiere chicken. Don't like corn? No problem just switch out the vegetables however you like! Experimenting with the flavors is half of the fun.

I've also been testing out different flavored olive oils. And it's amazing how it can impact the flavor of your dish. So far my favorites have come from O Olive Oil in California. They have been on my favorite "bargain" shopping website Ruelala a bunch, so I have been able to try quite a few of the flavors for a heavily reduced price. My personal favorites are the Jalapeno Lime and the Fresh Basil (I use this when making my Pasta Sauce recipe!. But there are several to choose from.

Another way to mess with this recipe is the type of rice you use. I use pearled cous cous, Kalyn's Kitchen uses brown rice, but you could really use any. I bet Zattarain's boxed Spanish Rice would taste pretty good as well.

If you mix up the recipe let me know some of the variations you try! I'd love to have a running list of great variations so that I can mix it up. If certain flavors work well for you feel free to post them in the comment section so everyone can benefit!

Stuffed Peppers

                   Ingredients

                  1 Box of Pearled Cous Cous
            4 Large Bell Peppers, any color
            1 Large Onion, Diced
            Olive Oil
            1 Lb. Spicy Italian Sausage
            Oregano
            1/2 Bag of Frozen Corn
            3 Green Onions, diced
            Parmesan Cheese
            Salt and pepper to taste 
            Panko Bread Crumbs
            2 tbsp. Butter
            Cabbage

Step 1: Chop the tops off of the peppers and pull out the seed balls. You can use a knife to carefully shave the bottom of the peppers so they will stand up. Cut is much as you can off of the discarded pepper tops and chop it up to use in your stuffing mixture.
Step 2: Cook to CousCous according to the packages instructions.

Step 3: Preheat your oven to 375 degrees. While your Cous Cous is cooking. Dice the onion. Heat the olive oil in a frying pan with high sides. (don't have one? a sauce pan works ok too!). Add the onion, green onion, diced peppers, corn, and oregano  to taste until soft and fragrant. 
Step 4: Remove the vegetable mixture and pour into a bowl and set aside. Using the same pan heat a tad more olive oil and cook the sausage until browned. Then add the vegetable mixture back into the pan and sautee for about 3-5 minutes to blend the flavors. Add salt and pepper to taste. 
Step 5: Mix in about 1/3 C. of parmesan into the mixture until melted.
Step 6: Line your pan with a very thin layer of olive oil. Stuff each pepper with the mixture and set into your pan. Mix 1/2 C. of parmesan and 1/2 C. of Panko bread crumbs together in a small bowl. Pour on top of your peppers. (and by pour i mean use your hands to create a thin layer of it over the peppers). Bake the peppers for about 20 minutes or until the pepper is soft and the tops are turning brown and crispy.
Step 7: If you have extra stuffing you can cook it in it's own dish with panko and parmesan on top. I love eating it for breakfast!
Step 8: While your peppers are cooking. Use the same pan to melt 2 Tbsp. of butter. Saute the cabbage until soft and slightly wilted. Season with Salt and Pepper.
Step 9: When everything is done make a bed of cabbage on your plates and lay the pepper on top and enjoy!

It may seem like there are a lot of steps, but there really isn't and it's fairly easy. If you do the chopping up front it will save you a lot of time as you work through the recipe. I hope you enjoy it, it's one of my new favorite recipes!

Happy Eating!

Tanner

Monday, January 27, 2014

Chicken Poblano Risotto

Being from Texas I love all things spicy. Really the spicier the better. I even ate a habanero pepper just to get a free drink at Freebirds. It wasn't so bad but I'm pretty sure I drank two large big reds before i could even touch my food ;). But despite my love of spice not everyone agrees, which can make cooking certain dishes tricky.

It can be hard to find a way to find the spice you are looking for especially when cooking for a group of people or a significant other who may not like as much spice. This recipe is a good compromise. It packs a little bit of a punch, but it's relatively mild and you aren't trying to gulp down your beverage to compensate. (P.S. rumor has it that milk is the way to soothe those burning mouths).

From a practical cooking standpoint I won't lie to you, risotto, while easy to make, can take some time because it has to absorb all of the fluids you add to it. Still, it's a pretty easy weeknight meal and it tastes great leftover, so make a big batch!  Just remember to be patient, it won't absorb it all at once.

Today's recipe is one I found from Chika, a fellow blogspot user at For the Love of Dessert, and I'm obsessed with it! She was seriously a genius for coming up with this recipe.

When using other people's recipes I generally try to add a little bit of my own flair. So in this case I changed the chicken up just a tad. She used some frozen chicken fingers. I personally prefer to cook my own chicken, so I have adapted the recipe for you to cook chicken with some cayenne pepper to give it a little extra something something. But head on over to her site if you want to see how she incorporated her chicken.

One last side note before I get to the recipe. THIS IS A REALLY GREAT MAN RECIPE. There is zero reason boys would not eat this. Do they think risotto is too fancy? Just call risotto rice and they'll never know the difference...If you're having people over to eat for the Superbowl this is really great alternative to finger foods and chili. (Not to say those aren't fantastic options as well)(p.s. Go Seahawks! just this once).


Chicken Poblano Risotto
(Serves 4 and takes about an hour to make) 
1 lb. Raw chicken tenders
Olive oil
Cayenne Pepper
Salt & Pepper
4 C. of chicken broth
Crushed red pepper flakes
1 large poblano pepper, chopped
1 Tbsp. chili powder
3 green onions, diced
 1 1/2 C. Arborio Rice
1/2 C. pinot grigio**
1 C. Parmesan shredded

**I like the middle sister brand to cook with!

 Step 1: Chop the chicken tenders into bite size squares. Sprinkle them with salt, pepper, and the cayenne pepper. (be generous with the cayenne). Heat 1 Tbsp. of olive oil in a high sided skillet on medium high heat. Then add the chicken. Cook until all sides of the chicken turn white. Cut into one to make sure the inside is not pink.

Step 2: Remove the chicken and place on a plate for later. In the same pan Heat some more olive oil and add red pepper flakes and poblano pepper. (About 1 tsp. of the red pepper flakes). Cook until the pepper is soft and fragrant.
  

Step 3: Boil the chicken broth in a small sauce pan. Once it begins to boil turn the heat down to a simmer.

Step 4: Pour the poblano peppers onto the chicken. continuing to use the same pan heat a little bit more olive oil, the green onions, 2 tsp. red pepper flakes and the chili powder. Cook until fragrant and the green onion is soft. 

Step 5: Add the rice and coat in the olive oil mixture. Then add the white wine, and stir until all of the wine has been absorbed into the rice. 
 
Step 6: Begin adding the chicken broth a little at a time. Stir continuously after each addition. Once all of the chicken broth has been absorbed add some more. Repeat until all of the broth is absorbed by the rice.

Step 7: Add the Parmesan cheese, and then add the chicken and poblano pepper back into the rice mixture. Then enjoy! You can garnish with more red pepper flakes if desired.

I paired this with a salad and one of the Shiner cheer beers I've stocked up on ;) It's amazing and I hope you like it!

Happy Eating!!!

Tanner
 

Thursday, April 25, 2013

Buffalo Chicken Cannolis

So I really debated posting these or waiting till football season, but I decided they were too good to hold off on. I've been going through a little of a spicy phase. I can't get enough! Especially jalapeños...don't know why, what an odd craving.

I found these little gems on one of my favorite blogs How Sweet It Is . They really have the best recipes ever! And these were no exception.

I personally thought these were a great week night meal, but they'd be great for game day. I wonder how buffalo chicken became a staple of game day flavors. I bet Hooters is to blame. Seriously though! So many recipes especially around football season use this flavor. Is it more "manly" to eat? Is it because it's spicy? Messy?

If this really is a manly meal I can't really complain my college roommate Allie and I are all about buffalo chicken or "buff chick" as we so lovingly refer to it. It's just so good! There was this pizza shop around the corner from our apartment in the bronx they had the BEST buff chick pizza. I'm pretty sure I have a picture of me eating a slice at 3 in the morning compliments of Allie...

no time to wait till I got home...

Anyway, I recommend EVERYONE try these cannolis and not just on game day.

Buffalo Chicken Cannoli
20 Flour tortillas (I bought fresh ones from Rosa's)
24 ounces Canola Oil (or whatever you like to fry things in)
2 1/2 C. Cooked chicken shredded or diced
1 whole large celery stalk, diced or minced
1/4 C. mayonnaise
1/4 C. Prepared hot wing sauce (more if you want)(I used Frank's Red Hot)
1/4 C. Blue cheese crumbles
1/2 tsp. Salt
1/2 tsp. Black Pepper

Step 1: I just folded the tortillas over to make a shell and secured it with a tooth pick. (**advice: make sure enough of the toothpick is visible so you can get it out after you fry them!). 


Step 2: Use a pan or pot that can fit about an inch and a half of oil in it. Heat it so it gets super hot. You know it's ready if you can flick a tiny bit of water on it and it crackles and bubbles. Place the tortillas in the pan 2 or 3 at a time. The tortilla will bubble. I recommend taking it out popping the bubble inside the shell and putting it back in. You don't want to not be able to stuff the center. Drain them on a paper towel.


Step 3:  In a mixing bowl toss the diced chicken and celery. In a second bowl mix the mayonnaise and hotwing sauce together. (This is the stage you can add more hot wing sauce to get a spicier or more mild flavor). You do want to try to make it a little hotter than you actually want it because this taste will mix with the chicken and celery which will minimize the heat. When it's where you want it mix in with the chicken and celery. Stir in some of the blue cheese if you want (or you can just serve it in the left over hot wing sauce later).


Step 4: Stuff the cannoli shells with the chicken mixture. You will likely have to go from both ends to fill the shell. Do your best to push it to the center. Then you are done!


I served mine with bell peppers but you could make any side to go with them, or put them on a try with hot wing sauce and blue cheese in the center!! 

Enjoy!!

<3 Tanner

Saturday, February 9, 2013

My new favorite weeknight meal: Scallops over wilted spinach and risotto

I never use to be  much of a fish eater. That didn't change 'til I was in college, and now I can't get enough of it. Scallops are really great because if cooked right they don't taste super fishy. I challenge all of you "non-fish eaters" to give these a try. If you don't like them then that's ok maybe you truly just don't like fishy foods, but I realllllllly think most of you will love this recipe. It's SO yummy.

To be fair, nothing in this recipe is super difficult it just takes a lot of time because you have 3 different portions of the meal to prepare. And on top of that I know that the thought of searing scallops will have many of you concerned, but you really shouldn't be. It's much easier than you'd think.

One of the best parts about this meal though is that you don't feel weighted down after eating it even with the risotto! That has become an essential requirement of my weeknight meals. I'd really prefer something lighter but filling during my weeknights, and this recipe fits that bill.

If you have particular questions about searing the scallops let me know! I'd be happy to walk you through the process or even show you if you want.

Scallops, Wilted Spinach, and Parmesan Risotto
Serves about 3 and takes about 40 minutes to make

1 C. Arborio Rice 
(for you Market Street goers, they have some that's "Made in Texas" it was greattt!!!!!)
4 tsp. Butter (separated)
2 Shallots minced (separated)
1/2 C. White Wine
4 C. Low Sodium Chicken Broth
1/4 C. Grated Parmesan Cheese 
(splurge on this a little. Don't use the kraft parmesan in a green bottle)
2 Tbs. Parsley, chopped
16 oz. Jumbo Sea scallops
1 tsp. Olive Oil
10 oz. Baby Spinach Washed

Step 1: Use a medium sauce pan and melt 2 tsp. of the butter on a medium heat. Then saute one shallots just for a minute. Ass the rice and mix until well coated and the rice becomes translucent. 

Step 2: Add the white wine and a dash of salt and pepper. Mix well.


Step 3: Pour 1 cup of the chicken stock and mix until the rice absorbs all of that stock. Continue to add 1 cup of the stock at a time mixing until absorbed each time. (tip! Stir constantly so nothing sticks to the bottom) 

Step 4: when all broth is absorbed add the parmesan and parsley until combined.

Step 5: (it cuts down on time if you start the next steps simultaneously with the risotto). Wash the scallops, pat them dry with a paper towel and season them with a little salt and pepper on each side. 


Step 6: Melt 1 tsp. of butter and place the scallops in the pan. Leave them alone for a few minutes until the bottom is the pretty light brown color. Then flip them and do the same on the other side. When the sides looks translucent you are good to go. 


Step 7: Using the same pan add the olive oil and the other shallot. Then add the spinach, constantly toss it until it wilts. Season with salt and pepper and you are ready to go.

Step 8: To serve scoop the risotto onto a plate, layer the spinach on top, and then place three scallops on top of that and you are good to go!


Hope you enjoy this delicious meal!

<3 Tan Tan

Wednesday, January 30, 2013

A Soup Every Man will Appreciate: Cheddar Ale Soup

Unless they are sick there is nothing harder then getting a guy to eat soup for an easy weeknight meal. Unless it's La Madeleine Tomato Basil...I don't know what it is about that soup that EVERYONE loves! Still, sometimes it's just to hard to come home and make a full meal every night. Soup (plus or minus a grilled cheese on the side) is an easy fix for that and a healthier alternative to a frozen dinner. Plus most of them take minimal effort. Unfortunately, for those of you with spouses or significant others eating soup somehow makes them less manly.

This recipe though was found AND COOKED!!!! by one of my guy friends Braden. He suggested this soup with potato nachos (a recipe for another time) one night to watch the playoff games. I have to admit when he told me it was a Cheddar Jalapeno Ale soup I was a little suspicious (rightfully so I think), but I was pleasantly surprised with how good it was! Beware that it definitely has a kick too it. It's a great fall/winter soup because it's a little thicker and heartier than say a chicken noodle.

Don't knock it till you try it because it was truly very good. Now that could change depending on what beer you use. Braden used the Alaskan Amber. If you want one that will for sure taste good I'd go for that. Stay away from anything too light or fruity. I wouldn't be surprised if Shiner went really well with this recipe. Be sure to comment if you try a certain beer you like!

You could also pair it with a beer bread or a sourdough to dip in the soup! Without further ado here is the recipe. Good luck!

<3 Tanner
Cheddar Jalapeno Ale Soup
1/2 Lb. bacon, 1" slices
2 stalks celery, diced
2+ Jalapeño peppers, diced (**we used 3)
2 cloves garlic, chopped
2 Tbs. butter
1/4 C. flour
12 oz. Ale
2 C. Chicken Broth
1/2 C. Heavy Cream
1 tsp. dijon mustard
1 Tbs. Worcestershire
2 C. Cheddar Cheese, shredded
Cayenne to taste
Salt & Pepper to Taste

Step 1: After slicing the bacon go ahead and cook it IN the pot you are going to make the soup in. When done scoop it out onto paper towels. Drain the pot, but reserve 2 Tbs. of the grease and keep it in the pot.


Step 2: Add celery and jalapeños and cook until they have softened and are fragrant. Then add the garlic and thyme and stir for a minute or two.


Step 3: Add the butter and stir till it melts. Slowly add the flower stirring constantly so it doesn't stick to the bottom.


Step 4: Add your beer of choice along with the chicken broth. While stirring be sure to wipe down the sides of the pan with your spoon so nothing is sticking. Add the bacon and cook for about 10 minutes. 


Step 5: Add your heavy cream, worcestershire and cheese. Cook until all the cheese is melted, but be sure that the soup doesn't reach it's boiling point!!


Step 6: Flavor as needed with the salt, pepper, and cayenne and serve it up! 


Enjoy!!!

Sunday, January 20, 2013

Easy Weeknight Dinner: Crab Cakes

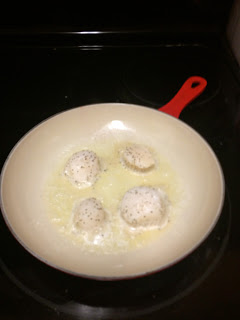
This is a little bit of a summery dish, but sometimes in the middle of the cold winter something light and (semi) fresh is just what the doctor ordered. These crab cakes are actually really easy to make. Even using the canned crab they still taste amazing. The seafood selection is not anything to brag about here in Lubbock, but they do have fresh? crab. It's just easier and a huge time saver to buy the canned lump meat. And like I said it taste good. BUTTTTT of course my motto is fresh is best so it's up to you.

I like to serve these with a salad. I usually just use romaine, green onion, feta, yellow tomatoes, a little salt and pepper and Brianna's Real French Vinaigrette dressing. Let's side bar about that for just a second. My aunt Nancy introduced me to Brianna's. I have tried a couple different ones and I love them all, but the Real French Vinaigrette is her best in my opinion. It's light and delicious and so far out of all the salad's I've made is everyone's favorite dressing. I literally could eat this salad every single day. Annndddd maybe I do, so shoot me :)

Ok but back to the crab cakes. They only take about 20-30 minutes total time in the kitchen, which is awesome!! Especially when there is a ton going on. That kind of time frame makes it so no one has any excuse to heat up a frozen dinner anymore. And 1 serving of this recipe is only 4 weight watcher points!!!!!

Give them a try, you won't be disappointed. And it's SO EASY! They only look hard to make, It's basically just mixing everything together forming little patties and pan frying. It doesn't get too much easier than that.


Crab Cakes
16 oz. "fresh" lump crabmeat, drained
4 large lemons
4 oz. diced pimiento, drained
2 green onions chopped
1 large egg, lightly beaten
2 Tbsp. mayonnaise (less WW points if you use the light kind!)
1 tsp. Old Bay seasoning
2 tsp. Dijon Mustard
1 cup pank bread crumbs
Canola Oil

Step 1: Forge through the crabmeat and make sure that no pieces of the shell got left behind. It's not that big of a deal if you miss one though

Step 2: Zest the lemons and cut them in half. Juice the lemons so you get 1/4 of a cup, but I just squeeze them right into the mixing bowl. It's up to you! Stir together zest, juice, pimento, onions, egg, mayonnaise, old bay, and mustard. Stir until everything is mixed together completely. Begin mixing in the crab and half of the bread crumbs.

Step 3: Gently form patties from the mixture. You can make them as big or as small as you like, but make sure they are firmly packed so they don't fall apart in the pan. Right before you are ready to put them in the pan coat the patties in the remaining breadcrumbs (you might need a little extra panko for this)

Step 4: The recipe said to cook them in 2 Tbsp. of hot oil in a non stick skillet. I personally think they cook better if you use more oil than that. I make sure the entire pan is covered in the oil and is about an 1/8 of an inch thick. This will mean you may have to drain the pan because any panko that falls off will start to burn. I just think the extra oil makes them cook faster and more evenly without burning, but that's just my experience with them. Cook for 2 minutes on each side or until they turn golden brown in color (you can pretty much eyeball this - does it look cooked? Then it probably is!

Step 5: Drain the Crab cakes on a paper towel to get off the extra grease. 

Serve them with lemon wedges and you are done!!!

Hope you enjoy! <3 tan tan

Friday, January 11, 2013

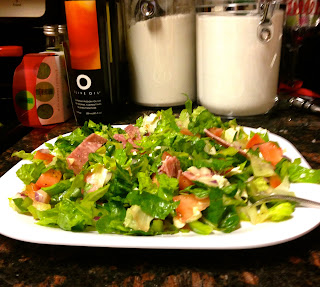
Quick Lunch: Italian Chopped Salad

New Year's Resolution #4 of 1,000,000. Eat out less and make healthier meals! I know this is always everyone's goal, but I am reallllllly going to try to stick to at least this one out of my bagillion resolutions. We can make excuse after excuse about how there is not enough time to make lunch, or I'll just heat up this frozen meal to save some time or to encourage our laziness. But fast food and even frozen foods are just so TERRIBLE for you. Don't get me wrong I love some McDonald's chicken nuggets every now and then, but one happy meal (you know those things for kids) is 17 weight watcher points. 17!!!!!!! That's 2/3 of my daily allotment. Just start doing a little bit of research, and you can see how much garbage goes into these products. Just knowing that will instantly help you make better choices!

We need to stop making excuses for ourselves and really put in the effort. If you plan your meals on sunday, when there is rarely going anything on anyway you can even make a ton of it ahead of time and be ready to go for the whole week.

This was a pintrest recipe I found, and it was a wonderful wonderful salad! It's 11 WW points per serving, but it's all good points! You could substitute meats or cheeses to minimize those points if you really wanted to. Just in general don't be afraid to play with recipes. I'm definitely guilty of looking at a recipe and saying "Yeah. No thanks!" That's silly. You can almost always substitute ingredients or play with the amounts to get a taste that suits you. In this particular recipe I played with the dressing. I wanted to tone down the red wine vinegar flavor. I added a little more garlic, salt, and pepper until it tasted right for me. You could also just pour in less red wine vinegar (but I didn't know that until it was already made).

One more challenge: FRESH IS BEST!!! Don't be afraid to use fresh vegetables because they go bad, or are more expensive. You can plan your menu around similar ingredients for the week. But either way it's worth it to eat fresh. It's better for you and it tastes better too!

This recipe also makes a ton, so just don't toss it in the dressing and you can have it a couple days in a row. Trust me you won't get tired of it. You'll want it all week!


Italian Chopped Salad
4 Romaine Hearts Diced
2 Roma Tomatoes, Seeded and Diced
1 Green Bell Pepper, Seeded and Diced
1/2 Red Onion, Diced
1/3 C. Kalamata Olives, Pitted and Diced
8 Oz. Fresh Mozzarella
4 Oz. Italian Dry Salami, Chopped
1 Tbs. Fresh Basil
1 Tbs. Fresh Parsley

Herbed Red Wine Vinaigrette
1/4 C. + 2 Tbs. Red Wine Vinegar
2 Garlic Cloves Pressed
1/4 tsp. Dijon Mustard
1/2 tsp. Salt
1/2 tsp. Italian Seasoning
Pinch of Ground Pepper
3/4 tsp. Sugar
1/4 C. + 2 Tbs. Olive Oil

Step 1: To make the salad Just combine all the ingredients!

Step 2: In a separate bowl add all ingredients through sugar and whisk to combine. Slowly add the oil whisking constantly, until combined. (Really give this a little bit of time so the flavors bend well) 

Step 3: Adjust the flavors as needed. (I topped the salad with fresh black pepper and it was amazing)

HOW EASY WAS THAT!!!! Enjoy!

Thursday, January 26, 2012

Pepperoni Pull Apart Bread!

Here it is!!!!!!! It's only been two days, but I have gotten more requests for this recipe then most of the other ones.

I have a tendency when I cook to not want to eat what I make. Mostly because I snack on things as I'm cooking, so by the end I'm no longer hungry. But I couldn't resist these. This recipe is great because it can be made for so many different things. A weeknight meal, after school snack time, a party appetizer, you name it.

The other great thing about the recipe is that it can be as easy or as hard as you want it to be. I made the dough from scratch...does that make you nervous or you don't have the time? Just use frozen dough. I bought large pepperoni's from the deli counter and cut them up, but really you can buy a package of the mini one's and you're good to go!

Pepperoni Pull Apart Bread!!!!

Dough:
1 3/4 cup warm water, divided
1 tsp sugar
1 envelope (2 1/4 tsp) instant yeast
2 Tbsp extra-virgin olive oil, plus more for greasing bowl and springform pan
4 cups (22 oz) bread flour, plus more for dusting
1 1/2 tsp salt

To make the Rolls:
2 cloves garlic, thinly sliced
4 Tbsp butter
2 lbs pizza dough (1 batch of above recipe)
6 oz mozzarella cheese, cut into small cubes (about 48)
48 slices pepperoni (from 1 package) - I bought 16 large slices and cut them in fours
2-3 cups marinara sauce, warmed, for serving

How to!
***Note: if you bought frozen dough skip steps 1-3, just make sure to let the dough thaw!
Step 1:
   put 1/2 a cup of warm water into a bowl (if you want to use a stand mixer use that bowl) and stir in sugar until dissolved. 

Step 2:
    Sprinkle the yeast over the top and let stand until frothy (this should only take a couple of minutes) then add remaining water and oil.

Step 3: 
      Add the flour and salt to the bowl. Then, I knead the dough with my hands until smooth and elastic. Not everyone likes to do that, so if you are using a mixer you want to use your dough hook. Mix on low until flour is combined then on high until dough is smooth and elastic. Cover with plastic wrap and let the dough double in size (about 1.5 - 2 hours). ***I always put mine on the dryer. I don't have confirmation that that makes it go faster, but they always say put it in a warm spot, and what's warmer than the top of the dryer?

Step 4:
    Heat the garlic and butter over medium heat just until the garlic begins to brown. Remove it from the heat and let sit. 

Step 5: 
     Lightly brush the inside of a bunt pan with garlic butter. (don't have a bundt pan? No problem! You can use any pan. I used an angel food cake pan so I could pull the sides away easily. 

Step 6:
    Pull of pieces of the dough and flatten. Lay a piece of pepperoni and a piece of mozzarella on top. Then wrap the dough around it and seal the edges together. Roll the dough in the garlic butter and place on the pan. And Repeat till the dough is gone!!!!

Step 7:
   Cover and let sit for 30 minutes. Meanwhile, preheat the oven to 400 degrees. 

Step 8:
    Bake for 35 minutes or until the top is very brown. Let it sit for 10 minutes and then you are ready to go! I use that 10 minutes to heat up the sauce. Any sauce will do whatever is your favorite!


I promise you won't be disappointed with this recipe!


Tuesday, November 29, 2011

The Juiciest Turkey you will ever eat!

Ok guys... I really can't believe I am even sharing this with you, but it's SO good I just couldn't resist. I have made it a couple of times now and it has been a hit every time. When I first decided I would tackle a turkey I didn't just do a basic simple recipe...no no I thought I would pull out the big guns and follow a recipe from Bon Appetite. While that may not have been my best idea IT TURNED OUT GREAT!!!!! And I had never even made a turkey before!

It wasn't dry...it was pretty to look at....and it smelled amazing. Most importantly it's truly not as difficult as it seems. It's mostly just time consuming. If you decide to try it out for Christmas, let me know beforehand and i'll give you some extra pointers. If you make it people will be asking you to make it year after year.

So what scares you most about working with a turkey? Overcooking it? Touching it? Pulling out the insides? Lighting your kitchen on fire? My biggest concern was touching the guts, but you just gotta do it. It's really not as bad as you think because most places have already done the worst of it for you.

Before I give you the recipe please note that this needs to brine 2 DAYS! before your meal. So you need to add extra time to that for thawing.

Herb Roasted Turkey W/ Apple Cider Gravy

Brining
  • 8 quarts cold water
  • 2 cups coarse kosher salt
  • 8 large fresh or dried bay leaves
  • 2 tablespoons black peppercorns
  • 2 tablespoons whole allspice
  • 1 16- to 17-pound turkey; giblets removed, neck reserved


Herb butter and gravy

  • 3 tablespoons minced fresh Italian parsley
  • 3 tablespoons minced fresh thyme
  • 3 tablespoons minced fresh sage
  • 3 tablespoons minced fresh marjoram
  • 1 teaspoon minced fresh rosemary
  • 1 teaspoon ground nutmeg
  • 3/4 cup (1 1/2 sticks) unsalted butter, room temperature


  • 4 cups low-salt chicken broth
  • 2 cups apple cider
  • 3 tablespoons all purpose flour
  • 1/2 cup whipping cream
  • 2 tablespoons Calvados (apple brandy) or other brandy

Roasting
  • 2 large Granny Smith apples, quartered, cored
  • 2 large onions, quartered
  • 1 cup apple cider


To brine the turkey: 
    ***Note this part needs to be done 2 days ahead
Step 1: Line extra-large pot with brining bags if you can find them (this is the easiest, but you can use two roasting bags or trash bags instead).

Step 2: Combine 1 quart water, salt, bay leaves, peppercorns, and allspice in large saucepan. Stir over medium heat until salt dissolves. Remove from heat. 

Step 3: Add 1 quart cold water and cool to lukewarm. When it has cooled some pour it into your bag(s) and mix in remaining 6 quarts of water. 

Step 4: Wrap turkey neck and refrigerate (I throw it away and don't use it, but do what you want!). 

Step 5: Submerge turkey in brine to cover completely, gathering bags tightly to eliminate any air; tie bags closed. 

Step 6: Refrigerate turkey in brine in pot at least 18 hours and up to 20 hours.

Step 7: (This should happen the night before your meal). Line large roasting pan with 4 layers of paper towels. Remove turkey from brine and drain well; discard brine. Place turkey in prepared pan. Cover with plastic wrap and refrigerate overnight.

For herb butter and gravy:
   ***This step happens the day of your meal
Step 1: Mix parsley, thyme, sage, marjoram, rosemary, and nutmeg in small bowl. Transfer 1/4 cup herb mixture to small bowl; mix in 1/2 cup butter.

Step 2: (I, personally, would wait and do this after you have the turkey in the oven.) Combine broth and apple cider in heavy large saucepan. Boil until reduced to 3 cups, about 20 minutes. 

Step 3: Pour broth reduction into bowl. Melt remaining 1/4 cup butter in same saucepan over medium-high heat. Add flour; stir 1 minute. Whisk in broth reduction, then cream, Calvados, and remaining herb mixture. Bring to boil; reduce heat to medium-low and simmer until gravy base is thickened and reduced to 2 3/4 cups, whisking often, about 20 minutes. Cool gravy base slightly. 

To roast the turkey:
Step 1: Position rack in bottom third of oven and preheat to 350°F. 

Step 2: Remove turkey from roasting pan; drain any accumulated juices from main cavity. Discard paper towels from roasting pan. 

Step 3: Melt herb butter in small saucepan over medium heat. Brush bottom of roasting pan with some of herb butter. Return turkey to prepared pan. 

Step 4: Tuck wing tips under; tie legs together loosely to hold shape. Place some apple quarters and onion quarters in main cavity. 

Step 5: Brush remaining herb butter over turkey; sprinkle with pepper. Scatter remaining apples and onions around turkey in pan. Add reserved turkey neck to pan (if using).


Step 6: Roast turkey 1 hour. Baste with 1/2 cup apple cider. (***NOTE: I am EXTRA generous with both the herb butter and the cider)


Step 7: Roast turkey 30 minutes. Baste with remaining 1/2 cup cider. Roast turkey until thermometer inserted into thickest part of thigh registers 175°F, basting turkey every 30 minutes with pan juices and covering breast loosely with foil if browning too quickly, about 2 hours longer (3 1/2 hours total). 


Step 8: Transfer turkey to platter; let stand at least 30 minutes before carving (internal temperature will rise 5 to 10 degrees).

Step 9: Discard apples, onions, and turkey neck from pan. Pour pan juices into large glass measuring cup; spoon off fat from surface. Pour degreased juices into gravy base and bring to boil over medium-high heat, whisking occasionally. 

Step 10: Boil until gravy thickens enough to coat spoon and is reduced to 3 1/2 cups, about 15 minutes. Season gravy to taste with pepper.


Hooray!!!!! When you make it all the way through you should be super super proud of yourself!