Wednesday, December 11, 2013

Homemade Pasta Sauce

For those of you who don't know...I've really been trying to embrace my Italian heritage and by embrace I really mean just talking about it a lot ;). But truly, my grandmother's family came to the US from Sicily and Naples and I have been dying to learn more about our family recipes and traditions. Problem is nobody ever wrote anything down! So I have been testing recipes from all over the place to find ones that I can adapt and hopefully turn into my own family recipes. If any of you would like to send me some of your family recipes I would absolutely LOVE that.

In my quest for great Italian recipes I came across the Tucci Cookbook written by Stanley Tucci.I've linked you to Amazon so you can buy it IMMEDIATELY. It's quickly becoming one of my favorite cookbooks, and I've loved every single recipe I've tried so far (be sure to try his meatball recipe with the sauce!). Not to mention I think he is incredible and I love him. The sauce I am including today is a modified version of his Sailor's Sauce. Nothing against the original recipe I just made some small changes to get the taste I was looking for. I still recommend buying the book. you won't be disappointed.

When making pasta, for me, the sauce makes the meal. It doesn't bother me if the noodles are too hard or too soft, but if I don't like the sauce then forget about it. I won't eat it (well...i probably still would it's hard for me to say no to food). Before my cooking days, back when I didn't understand the value of freshness, I was a lover of Prego pasta sauce...how foolish. I'm so sorry Prego, while your sauce in a jar is easy...you just pop the top and pour it in...it's also LAME and not as tasty not to mention horribly unhealthy. Making your own sauce is EASY. I feel like I say this every post, but I really do try to post recipes that are user friendly (most of the time at least).

You can't even try to tell me you can't do this recipe or it's too hard because even my college age brother accomplished this recipe for a class project.

FRESH. IS. BEST.

The second best part about making homemade pasta sauce from scratch is that you can make multiple batches at a time and freeze them or give them as a hostess gift or just eat pasta every day for a week! Anyway you look at it trying this recipe is a win win and you should go to the store after school or after work and pick up the few ingredients you need and get to cooking! 

TB's Homemade Pasta Sauce
Adapted from Stanley Tucci's Sailor Sauce
1/2 C. olive oil
6 cloves of garlic, crushed*
1/2 of an onion chopped
8 C. Cento Brand whole plum tomatoes (or San Marzano tomatoes)**
2 tsp. of fresh oregano 
1 package of fresh basil leaves, chopped or whole (i like chopped better)
Salt and Pepper to taste


*send the garlic through a garlic press or chop it, but then use the back of the knife to crush the garlic
**I rarely find these with the other tomatoes they are usually in a different location or just further down the aisle. They come in a yellow can.


Step 1: Find a pan large enough to hold the sauce. You really want a frying pan with tall sides, but you could use a pot if you want. Heat the olive oil over a medium high heat.

Step 2: Add the onions and olive oil to the pan and cook until fragrant and the onions have begun to soften (they will continue to soften as you cook the sauce). 

Step 3: Add the tomatoes (DO NOT DRAIN THEM!). You'll need to crush them. I recommend using your hands, but beware if you squeeze red sauce will get on your clothes. You can also use a potato masher to break them up.

Step 4: Stir in the remaining ingredients. For the basil use as much or as little as you want, but I'd use at least 5 leaves, but it won't hurt your sauce if you add some more. For the salt and pepper..THIS IS THE MOST IMPORTANT PART!...this will make or break your sauce. Too little the sauce can be bland too much and you feel like you cooked with salt water. Add some let the sauce simmer taste and add some more. Continue this until you've reached the taste you want. 

Step 5: Let the pasta simmer until it reaches your desired consistency. It should thicken as you go. I personally just let it sit on the stove until I'm done making the rest of dinner, but you should start checking on it after about 20 minutes.

As always if you have any questions about the recipe feel free to ask! I hope you like it. You can thank Mr. Tucci for the base recipe by buying his cookbook :) 

Happy Eating! Xoxo Tanner

Tuesday, November 26, 2013

Caramel Apple Cupcakes

I have a lot of questions about caramel. First of all how do you even say it? Is it Car-mel or do you pronounce it more like care-a-mel? The poor candy must suffer an identity crisis. Other questions include:
      • Why is caramel associated with fall
      • Why do I continue to eat bagfuls of it when I loathe that it gets stuck in my teeth? 
      • WHY IS IT SO HARD TO MAKE?!?!?! 
The questions are endless. For such a tiny little square it causes quite an uproar in my little baking world. Yet every September I start thumbing through recipes to see what I can use it in this year. If I'm being honest I haven't quite mastered the art of making true caramel from scratch. But the individually wrapped candies work just as well...for now. One day I WILL figure it out.

I've loved eating caramel apples for as long as I can remember. I'd like to say I got my start eating them at the State Fair of Texas, but I honestly couldn't tell you when our love affair began. But even through the tumultuous braces years caramel and I stuck together. Maybe that's why I love this recipe by Rachel Ray so much. Plus it uses 2 whole apples, so that makes it healthy right?


It's a relatively basic recipe, but you have to be quick when melting the caramels. Using the heavy cream definitely helps. You don't want it to get hard and clumpy. But you also don't want it to be too runny. If It gets too runny add more caramels, if it gets too hard add a little bit more cream. Don't be afraid to mess with these recipes. Very rarely have I ever started a recipe and made it exactly like the person wrote it. We all have different tastes, and most recipes can be adjusted accordingly. (That doesn't mean add a cup of cinnamon because you like it) But a little extra or less here and there is just fine.

This is a great recipe and pretty easy to make if you need a kid friendly dessert this Thanksgiving. Or if you just want to show up and impress your family, in-laws, or friends. Hope you enjoy it!

Caramel Apple Cupcakes
1 1/4 cups flour
2 tsps baking powder
1/2 tsp ground cinnamon*
1/2 tsp salt
2 eggs
1/2 C. packed light brown sugar
1/2 C. sugar
1/2 C. vegetable oil
tsp. vanilla extract
Apples peeled and shredded**
1 1/2 C. chewy caramel candies***
1 Tbsp. heavy cream
 *I used a full teaspoon!
**Shred the apples on a cheese grater (on the small holes) --->
***Don't forget to unwrap them!!

Step 1: Preheat the oven to 350. Prepare your cupcake pan with liners or spray it with cooking spray (save yourself the trouble and use the liners)

Step 2: With a fork or whisk mix the first four ingredients together.


Step 3: In a separate bowl, mix the eggs and sugars together until smooth. Then add the vegetable oil and vanilla.

Step 4: Add the wet mixture into the flour and then fold the apples into your batter.

Step 5: Spoon the batter into the cups so they are about 3/4 of the way full. (That way you don't risk overflow in the oven. This also makes it easier to get them out and another batch in with little to no clean up between). They will need 20-30 minutes in the oven.

Step 6: Unwrap your candies and dump them into a small sauce pan over high heat. PAY ATTENTION TO THEM! DO NOT WALK AWAY! Once they have mostly melted turn down to medium low heat and add the heavy cream and stir until smooth.

Step 7: QUICKLY! Spoon the caramel over the cupcake. It's up to you how much to put on the cupcake, but just know the caramel will sit pretty thin on top of the cupcake unless you add more layers of caramel.

I personally think the thin layer is fine! It gives you the same effect as a caramel apple would and a thick layer of caramel would just detract from the cupcake anyway. Just work quickly because once it hardens you can't scoop it. IF it does harden, put it back on the stove on medium heat and add a tiny bit more cream to soften it up.

Another note: The original recipe calls for the caramels to be melted in the microwave. Personally I prefer melting any candy, chocolate or caramel, over the stove. I think it works better and sometimes in the microwave if you put it in too long it doesn't melt correctly. Its up to you but I advise the stove :)

Hope these turn out as good for you as they did for me! I'm a big fan :)

HAPPY TURKEY DAY! and safe travels :)

xoxo
Tanner

Wednesday, November 20, 2013

Beb's Banana Pudding

I never know how to feel on Hayden's birthday. Should I be sad? Should I celebrate? Should I ignore it? It's the second hardest day of the year for me. I want to be happy and celebrate it but it's hard to ignore the lingering and nagging grief and sadness, She should be the one celebrating not me. But in true Hayden fashion I'm sure she is at the beach somewhere getting a super dark tan and reading the flood of Facebook messages that are finally all about her ;).

I really embraced cooking after she died. It was an outlet, I didn't have to think. But most importantly the smells and the food itself were so comforting. Pasta's, cupcakes, popcorns...all that stuff that is so bad for you but warms your heart and reminds you of home all at the same time. I've often thought about writing a book about cooking through grief and how it helped me get by. As tragic as this situation has been and still is, the silver lining was that I found a love for cooking and sharing that with all of you.

Today I have really loved seeing everyone remembering, wearing purple or pieces of her clothing, eating her favorite foods. So it's only appropriate to share a recipe for one of her all time favorite foods...Banana Pudding.

 
First, you need a little back story on this gem of a snack. I guess it all goes back to Black Eyed Pea. We had one down the street and frequently ate there as a family. I don't think anyone ever ate their meals especially not the vegetables, but we certainly ate that banana pudding. It was a moment where all four of us could come together and appreciate something (that doesn't happen often). This period was follwed by a lull in banana pudding eating. Not to worry though, we more than made up for lost time when Hayden moved up to New York with me. I had discovered that Magnolia Bakery offered a $45 dollar tub...yes a large TUB of banana pudding. I made the mistake of telling Hayden about these heavenly tubs, and soon she was there on a regular basis. She would single handedly devour those tubs. She might have claimed to buy one for her whole apartment, but we all know she would just finish it alone in one sitting. Those expensive tubs brought her so much joy, and brought the rest of us years of laughs with her then and now.

The banana pudding recipe I'm going to share with you is by Paula Deen. Everyone can have their opinion about her, but the lady is a darn good cook. And her banana pudding is absolutely amazing. Lots of southern families have family recipes that have been passed down, but do yourself a favor and give this one a try. It might just become your new favorite and one of the best ways to remember Hayden.

Beb's Banana Pudding

2 bags Pepperidge Farm Chessmen cookies*
6 to 8 bananas, sliced
2 cups milk
1 box instant** French vanilla pudding (5 oz.)
1  package cream cheese (8 oz), softened
1 can sweetened condensed milk (14 oz.)
1  container Cool Whip thawed (12 oz)

*Make sure to get the seasonal ones for Christmas!
**Make sure you get instant! This is essential

Step 1: Use the cookies to line the bottom of a 13 by 9 inch casserole dish, Then make a second layer with the sliced bananas.


Step 2: Blend the milk and pudding mix with an electric mixer. In a separate bowl, mix the cream cheese and condensed milk together until smooth. (DON'T CHEAT! Make sure it's smooth). Gently add the cool whip into the cream cheese mixture and then add to the pudding mixture. Stir until completely blended.

Step 3: Pour the mixture over the cookies and bananas. Then top it off with a final layer of cookies.
 
Step 4: Refrigerate! You could eat it right away but I suggest refrigerating for 1-2 hours so it gets nice and cool. The way banana pudding should be eaten.
 
I hope you like this recipe as much as I do. It has become a staple in my recipe arsenal, and it is a quick and easy dish to bring to any get together or party you may have especially during this hectic holiday season. 

Happy Eating and lots of love to HH today. Happy Birthday Beb, we all love you very much
xoxo Tanner

Tuesday, November 19, 2013

Applesauce: an easy and moderately healthy fall must

I know I took a pretty long break from blogging, but that's what happens when graduation, moot court, bar studying, travels, and life gets in the way. Hopefully now that I have to be a grown up with a real work schedule I'll get to blog a lot more. People always ask for my recipes and i've made a thousand promises to post them but haven't. My apologies.


TasteAnywho...As a childless adult the last thing I think of when it comes to snack time is applesauce. That's a mistake because as soon as i eat one little spoonful that child inside of me just comes skipping right out. IT IS SO GOOD!!! When and why do we ever stop eating applesauce? Why does it have to be left to the wee ones. Who made that rule because it is bogus. That being said I got this recipe from a mommy blog haha. (recipe is curtesy of mommymakesitbetter.com)

Smell. Homemade applesauce makes your house smell like fall. I didn't even want to turn off my crockpot because I didn't want to make the smell go away. And you still have a week and a half  before we start switching scents to fir trees, fire and snow! Take advantage of it!! But you also don't have to limit this recipe to the fall. It's good all year long :)

Ease. There is literally zero excuse for not trying this. A recipe doesn't get any easier than this. SO TRY IT. If you don't have a crockpot go buy one. Talk about convenience you can do literally anything in that thing. It's worth the whopping $30 you'll spend on one. You could even get one cheaper but I wanted a timer.

Oh and p.s...... it's only 1 a whopping 1 weight watcher point per serving!!


JUST TRY IT!! YOU'LL LOVE IT! :)

Cinnamon Applesauce

8 apples - any type but I like using honey crisp 
1 strip of lemon peel*
1 tsp. fresh lemon juice
2 3in. cinnamon sticks
5 tsp. light brown sugar 

*I skip this because it makes it too lemony and you can't get all the rind out sometimes and I hate the way that tastes.


Step 1: Peel, core and chop the apples. What I do is peel it (I attempt to do it in one string it doesn't happen often. You can use a veggie peeler) then I make a square around the core cutting off the sides and then I chop those large pieces.
Step 2: Toss them in the crock pot and add the rest of the ingredients

Step 3: Set your crock pot to low and cook for 6 hours. 

Step 4: Optional. blend your mixture if you want it super smooth or just use a whisk to stir and eat it chunky! I then put it in old jars like a pasta sauce jar or a salsa jar that's been thoroughly rinsed out.


AND YOU'RE DONE! Congrats on making the bestest, easiest recipe EVER! Don't be afraid to play with the proportions (adding things or taking things away to get the flavor YOU want) Let me know how it goes! 

xoxo Tanner

Tuesday, April 30, 2013

"Come quickly: I'm tasting the stars!"

That's supposedly what Dom Perignon said after he created his champagne. What a wonderful thing to say about food. It's romantic and beautiful and makes me want to pop open a bottle right now. There is something magical about stars and that magic translates to champagne (Mimosas while delicious do not count).

We tend to save champagne for special occasions. I don't know why. On the one hand, if it were an every day drink it would lose it's glamour. On the other, such a wonderful drink is meant to be enjoyed. So we compromise and can use it to cook with. We can eat the stars instead of drinking them, and save those sips for a truly special occasion.

I made these at the very beginning of law school and rekindled them with a new icing a couple of weeks ago for one of my very best friends birthdays. I combined them with a raspberry buttercream, but I imagine strawberries and a variety of other fruits would make just as good of an icing to pair with the cupcake.

The magical thing about these cupcakes is their fluffiness. This past time I think I used a tiny bit too much flour, which made them a little cakey, but generally they are a super fluffy cupcake that melts in your mouth. They make the perfect dessert for any occasion whether it be a birthday, wedding shower, or New Years Eve party! I hope you enjoy them as much as I do.

(Side note: who wants to teach me how to take better pictures of my food?)

Champagne Cupcakes w/ Raspberry Buttercream

For the Cupcake
2 3/4 c. Flour
3 tsp. Baking powder
1 tsp. salt
2/3 C. Butter
1 1/2 C. Sugar
3/4 C. Champagne (any kind will do)
6 egg whites

For the Raspberry Buttercream
Butter
Powdered Sugar
Raspberries (i used 2 6 oz. packages)
Milk, Vanilla, Food coloring as needed

Step 1: Preheat the oven to 350 degrees, and line or grease your muffin pan. Cream the butter and sugar until fluffy (Advice: Don't skimp on this! Make sure it's really blended well). In another bowl sift the flower, baking powder, and salt. 

Step 2: Blend the flour mixture and champagne into the butter mixture. Start with a little flour, then add a little champagne, go back and forth ending with flour. 

Step 3: Put the egg whites in a separate bowl and beat (with a hand mixer) until stiff peaks form. (**Advice: this takes time!!! If you've never done it before you should be able to stick your finger in and pull it out, when you do a stiff peak will form. It shouldn't be gooey and it shouldn't collapse. If it does that then you aren't there yet!) It gets a little tiring but it's worth it!)

Step 4: Fold 1/3 of the egg whites into the batter to soften it up, and then add the rest of the egg whites.
Try not to stir! You don't want to over mix, you want them to just gently be added.

Step 5: Fill the cupcake liners 2/3 of the way full, and then bake! They should take about 20 min., but keep an eye on them

For the butter cream

Step 1: Puree the raspberries until smooth. Run it through a sieve if you don't want the seeds, but it tastes great either way.

Step 2: Cream the butter. Then slowly begin adding the powdered sugar. Once blended pretty well you can add the raspberry mixture. 

Step 3 (OPTIONAL): I would not add vanilla for this recipe, but you could or you could make a plain buttercream using vanilla. If your icing is too runny keep adding sugar to thicken it. If it's too thick for you (this really shouldn't be too big of an issue) add a tablespoon of milk to help thin it out a little bit. 

Step 4: There are several ways to ice them. I am too cheap to buy good icing bags and tips. The more I bake the dumber that is. But assuming you don't own those things. Fill a ziplock back with the icing and cut just a small small bit of the corner off and use it to ice the cupcake however you want!

Enjoy!!!! 

xoxo <3 tan

Thursday, April 25, 2013

Buffalo Chicken Cannolis

So I really debated posting these or waiting till football season, but I decided they were too good to hold off on. I've been going through a little of a spicy phase. I can't get enough! Especially jalapeños...don't know why, what an odd craving.

I found these little gems on one of my favorite blogs How Sweet It Is . They really have the best recipes ever! And these were no exception.

I personally thought these were a great week night meal, but they'd be great for game day. I wonder how buffalo chicken became a staple of game day flavors. I bet Hooters is to blame. Seriously though! So many recipes especially around football season use this flavor. Is it more "manly" to eat? Is it because it's spicy? Messy?

If this really is a manly meal I can't really complain my college roommate Allie and I are all about buffalo chicken or "buff chick" as we so lovingly refer to it. It's just so good! There was this pizza shop around the corner from our apartment in the bronx they had the BEST buff chick pizza. I'm pretty sure I have a picture of me eating a slice at 3 in the morning compliments of Allie...

no time to wait till I got home...

Anyway, I recommend EVERYONE try these cannolis and not just on game day.

Buffalo Chicken Cannoli
20 Flour tortillas (I bought fresh ones from Rosa's)
24 ounces Canola Oil (or whatever you like to fry things in)
2 1/2 C. Cooked chicken shredded or diced
1 whole large celery stalk, diced or minced
1/4 C. mayonnaise
1/4 C. Prepared hot wing sauce (more if you want)(I used Frank's Red Hot)
1/4 C. Blue cheese crumbles
1/2 tsp. Salt
1/2 tsp. Black Pepper

Step 1: I just folded the tortillas over to make a shell and secured it with a tooth pick. (**advice: make sure enough of the toothpick is visible so you can get it out after you fry them!). 


Step 2: Use a pan or pot that can fit about an inch and a half of oil in it. Heat it so it gets super hot. You know it's ready if you can flick a tiny bit of water on it and it crackles and bubbles. Place the tortillas in the pan 2 or 3 at a time. The tortilla will bubble. I recommend taking it out popping the bubble inside the shell and putting it back in. You don't want to not be able to stuff the center. Drain them on a paper towel.


Step 3:  In a mixing bowl toss the diced chicken and celery. In a second bowl mix the mayonnaise and hotwing sauce together. (This is the stage you can add more hot wing sauce to get a spicier or more mild flavor). You do want to try to make it a little hotter than you actually want it because this taste will mix with the chicken and celery which will minimize the heat. When it's where you want it mix in with the chicken and celery. Stir in some of the blue cheese if you want (or you can just serve it in the left over hot wing sauce later).


Step 4: Stuff the cannoli shells with the chicken mixture. You will likely have to go from both ends to fill the shell. Do your best to push it to the center. Then you are done!


I served mine with bell peppers but you could make any side to go with them, or put them on a try with hot wing sauce and blue cheese in the center!! 

Enjoy!!

<3 Tanner

Saturday, February 9, 2013

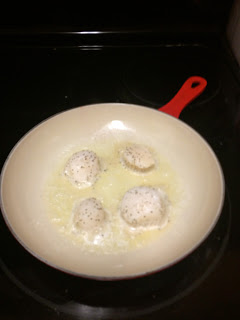
My new favorite weeknight meal: Scallops over wilted spinach and risotto

I never use to be  much of a fish eater. That didn't change 'til I was in college, and now I can't get enough of it. Scallops are really great because if cooked right they don't taste super fishy. I challenge all of you "non-fish eaters" to give these a try. If you don't like them then that's ok maybe you truly just don't like fishy foods, but I realllllllly think most of you will love this recipe. It's SO yummy.

To be fair, nothing in this recipe is super difficult it just takes a lot of time because you have 3 different portions of the meal to prepare. And on top of that I know that the thought of searing scallops will have many of you concerned, but you really shouldn't be. It's much easier than you'd think.

One of the best parts about this meal though is that you don't feel weighted down after eating it even with the risotto! That has become an essential requirement of my weeknight meals. I'd really prefer something lighter but filling during my weeknights, and this recipe fits that bill.

If you have particular questions about searing the scallops let me know! I'd be happy to walk you through the process or even show you if you want.

Scallops, Wilted Spinach, and Parmesan Risotto
Serves about 3 and takes about 40 minutes to make

1 C. Arborio Rice 
(for you Market Street goers, they have some that's "Made in Texas" it was greattt!!!!!)
4 tsp. Butter (separated)
2 Shallots minced (separated)
1/2 C. White Wine
4 C. Low Sodium Chicken Broth
1/4 C. Grated Parmesan Cheese 
(splurge on this a little. Don't use the kraft parmesan in a green bottle)
2 Tbs. Parsley, chopped
16 oz. Jumbo Sea scallops
1 tsp. Olive Oil
10 oz. Baby Spinach Washed

Step 1: Use a medium sauce pan and melt 2 tsp. of the butter on a medium heat. Then saute one shallots just for a minute. Ass the rice and mix until well coated and the rice becomes translucent. 

Step 2: Add the white wine and a dash of salt and pepper. Mix well.


Step 3: Pour 1 cup of the chicken stock and mix until the rice absorbs all of that stock. Continue to add 1 cup of the stock at a time mixing until absorbed each time. (tip! Stir constantly so nothing sticks to the bottom) 

Step 4: when all broth is absorbed add the parmesan and parsley until combined.

Step 5: (it cuts down on time if you start the next steps simultaneously with the risotto). Wash the scallops, pat them dry with a paper towel and season them with a little salt and pepper on each side. 


Step 6: Melt 1 tsp. of butter and place the scallops in the pan. Leave them alone for a few minutes until the bottom is the pretty light brown color. Then flip them and do the same on the other side. When the sides looks translucent you are good to go. 


Step 7: Using the same pan add the olive oil and the other shallot. Then add the spinach, constantly toss it until it wilts. Season with salt and pepper and you are ready to go.

Step 8: To serve scoop the risotto onto a plate, layer the spinach on top, and then place three scallops on top of that and you are good to go!


Hope you enjoy this delicious meal!

<3 Tan Tan

Wednesday, January 30, 2013

A Soup Every Man will Appreciate: Cheddar Ale Soup

Unless they are sick there is nothing harder then getting a guy to eat soup for an easy weeknight meal. Unless it's La Madeleine Tomato Basil...I don't know what it is about that soup that EVERYONE loves! Still, sometimes it's just to hard to come home and make a full meal every night. Soup (plus or minus a grilled cheese on the side) is an easy fix for that and a healthier alternative to a frozen dinner. Plus most of them take minimal effort. Unfortunately, for those of you with spouses or significant others eating soup somehow makes them less manly.

This recipe though was found AND COOKED!!!! by one of my guy friends Braden. He suggested this soup with potato nachos (a recipe for another time) one night to watch the playoff games. I have to admit when he told me it was a Cheddar Jalapeno Ale soup I was a little suspicious (rightfully so I think), but I was pleasantly surprised with how good it was! Beware that it definitely has a kick too it. It's a great fall/winter soup because it's a little thicker and heartier than say a chicken noodle.

Don't knock it till you try it because it was truly very good. Now that could change depending on what beer you use. Braden used the Alaskan Amber. If you want one that will for sure taste good I'd go for that. Stay away from anything too light or fruity. I wouldn't be surprised if Shiner went really well with this recipe. Be sure to comment if you try a certain beer you like!

You could also pair it with a beer bread or a sourdough to dip in the soup! Without further ado here is the recipe. Good luck!

<3 Tanner
Cheddar Jalapeno Ale Soup
1/2 Lb. bacon, 1" slices
2 stalks celery, diced
2+ Jalapeño peppers, diced (**we used 3)
2 cloves garlic, chopped
2 Tbs. butter
1/4 C. flour
12 oz. Ale
2 C. Chicken Broth
1/2 C. Heavy Cream
1 tsp. dijon mustard
1 Tbs. Worcestershire
2 C. Cheddar Cheese, shredded
Cayenne to taste
Salt & Pepper to Taste

Step 1: After slicing the bacon go ahead and cook it IN the pot you are going to make the soup in. When done scoop it out onto paper towels. Drain the pot, but reserve 2 Tbs. of the grease and keep it in the pot.


Step 2: Add celery and jalapeños and cook until they have softened and are fragrant. Then add the garlic and thyme and stir for a minute or two.


Step 3: Add the butter and stir till it melts. Slowly add the flower stirring constantly so it doesn't stick to the bottom.


Step 4: Add your beer of choice along with the chicken broth. While stirring be sure to wipe down the sides of the pan with your spoon so nothing is sticking. Add the bacon and cook for about 10 minutes. 


Step 5: Add your heavy cream, worcestershire and cheese. Cook until all the cheese is melted, but be sure that the soup doesn't reach it's boiling point!!


Step 6: Flavor as needed with the salt, pepper, and cayenne and serve it up! 


Enjoy!!!

Sunday, January 20, 2013

Easy Weeknight Dinner: Crab Cakes

This is a little bit of a summery dish, but sometimes in the middle of the cold winter something light and (semi) fresh is just what the doctor ordered. These crab cakes are actually really easy to make. Even using the canned crab they still taste amazing. The seafood selection is not anything to brag about here in Lubbock, but they do have fresh? crab. It's just easier and a huge time saver to buy the canned lump meat. And like I said it taste good. BUTTTTT of course my motto is fresh is best so it's up to you.

I like to serve these with a salad. I usually just use romaine, green onion, feta, yellow tomatoes, a little salt and pepper and Brianna's Real French Vinaigrette dressing. Let's side bar about that for just a second. My aunt Nancy introduced me to Brianna's. I have tried a couple different ones and I love them all, but the Real French Vinaigrette is her best in my opinion. It's light and delicious and so far out of all the salad's I've made is everyone's favorite dressing. I literally could eat this salad every single day. Annndddd maybe I do, so shoot me :)

Ok but back to the crab cakes. They only take about 20-30 minutes total time in the kitchen, which is awesome!! Especially when there is a ton going on. That kind of time frame makes it so no one has any excuse to heat up a frozen dinner anymore. And 1 serving of this recipe is only 4 weight watcher points!!!!!

Give them a try, you won't be disappointed. And it's SO EASY! They only look hard to make, It's basically just mixing everything together forming little patties and pan frying. It doesn't get too much easier than that.


Crab Cakes
16 oz. "fresh" lump crabmeat, drained
4 large lemons
4 oz. diced pimiento, drained
2 green onions chopped
1 large egg, lightly beaten
2 Tbsp. mayonnaise (less WW points if you use the light kind!)
1 tsp. Old Bay seasoning
2 tsp. Dijon Mustard
1 cup pank bread crumbs
Canola Oil

Step 1: Forge through the crabmeat and make sure that no pieces of the shell got left behind. It's not that big of a deal if you miss one though

Step 2: Zest the lemons and cut them in half. Juice the lemons so you get 1/4 of a cup, but I just squeeze them right into the mixing bowl. It's up to you! Stir together zest, juice, pimento, onions, egg, mayonnaise, old bay, and mustard. Stir until everything is mixed together completely. Begin mixing in the crab and half of the bread crumbs.

Step 3: Gently form patties from the mixture. You can make them as big or as small as you like, but make sure they are firmly packed so they don't fall apart in the pan. Right before you are ready to put them in the pan coat the patties in the remaining breadcrumbs (you might need a little extra panko for this)

Step 4: The recipe said to cook them in 2 Tbsp. of hot oil in a non stick skillet. I personally think they cook better if you use more oil than that. I make sure the entire pan is covered in the oil and is about an 1/8 of an inch thick. This will mean you may have to drain the pan because any panko that falls off will start to burn. I just think the extra oil makes them cook faster and more evenly without burning, but that's just my experience with them. Cook for 2 minutes on each side or until they turn golden brown in color (you can pretty much eyeball this - does it look cooked? Then it probably is!

Step 5: Drain the Crab cakes on a paper towel to get off the extra grease. 

Serve them with lemon wedges and you are done!!!

Hope you enjoy! <3 tan tan

Friday, January 11, 2013

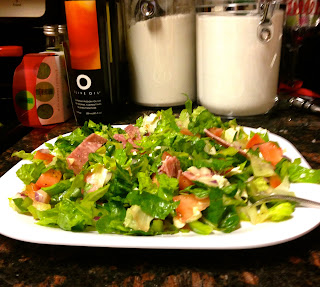
Quick Lunch: Italian Chopped Salad

New Year's Resolution #4 of 1,000,000. Eat out less and make healthier meals! I know this is always everyone's goal, but I am reallllllly going to try to stick to at least this one out of my bagillion resolutions. We can make excuse after excuse about how there is not enough time to make lunch, or I'll just heat up this frozen meal to save some time or to encourage our laziness. But fast food and even frozen foods are just so TERRIBLE for you. Don't get me wrong I love some McDonald's chicken nuggets every now and then, but one happy meal (you know those things for kids) is 17 weight watcher points. 17!!!!!!! That's 2/3 of my daily allotment. Just start doing a little bit of research, and you can see how much garbage goes into these products. Just knowing that will instantly help you make better choices!

We need to stop making excuses for ourselves and really put in the effort. If you plan your meals on sunday, when there is rarely going anything on anyway you can even make a ton of it ahead of time and be ready to go for the whole week.

This was a pintrest recipe I found, and it was a wonderful wonderful salad! It's 11 WW points per serving, but it's all good points! You could substitute meats or cheeses to minimize those points if you really wanted to. Just in general don't be afraid to play with recipes. I'm definitely guilty of looking at a recipe and saying "Yeah. No thanks!" That's silly. You can almost always substitute ingredients or play with the amounts to get a taste that suits you. In this particular recipe I played with the dressing. I wanted to tone down the red wine vinegar flavor. I added a little more garlic, salt, and pepper until it tasted right for me. You could also just pour in less red wine vinegar (but I didn't know that until it was already made).

One more challenge: FRESH IS BEST!!! Don't be afraid to use fresh vegetables because they go bad, or are more expensive. You can plan your menu around similar ingredients for the week. But either way it's worth it to eat fresh. It's better for you and it tastes better too!

This recipe also makes a ton, so just don't toss it in the dressing and you can have it a couple days in a row. Trust me you won't get tired of it. You'll want it all week!


Italian Chopped Salad
4 Romaine Hearts Diced
2 Roma Tomatoes, Seeded and Diced
1 Green Bell Pepper, Seeded and Diced
1/2 Red Onion, Diced
1/3 C. Kalamata Olives, Pitted and Diced
8 Oz. Fresh Mozzarella
4 Oz. Italian Dry Salami, Chopped
1 Tbs. Fresh Basil
1 Tbs. Fresh Parsley

Herbed Red Wine Vinaigrette
1/4 C. + 2 Tbs. Red Wine Vinegar
2 Garlic Cloves Pressed
1/4 tsp. Dijon Mustard
1/2 tsp. Salt
1/2 tsp. Italian Seasoning
Pinch of Ground Pepper
3/4 tsp. Sugar
1/4 C. + 2 Tbs. Olive Oil

Step 1: To make the salad Just combine all the ingredients!

Step 2: In a separate bowl add all ingredients through sugar and whisk to combine. Slowly add the oil whisking constantly, until combined. (Really give this a little bit of time so the flavors bend well) 

Step 3: Adjust the flavors as needed. (I topped the salad with fresh black pepper and it was amazing)

HOW EASY WAS THAT!!!! Enjoy!

Friday, January 4, 2013

Sinfully Addicting Red Velvet Brownies

I want to write about how just how amazing these brownies are, but the words cannot do these little guys justice. It's definitely the most requested recipe by friends and family, and they have been huge hits when i've given them as gifts. With Valentines day right around the corner, this could be a good recipe to perfect!

I will give fair warning about experimenting with the recipe though. I tried to double a batch and it was a failure. I haven't decided if it's because the ingredients don't work well doubled or if it just made them two thick. I used the same size pan as a single batch, so perhaps if I had switched to a rectangle they would have cooked more evenly. That being said, if any of you try to alter the recipe and succeed (or fail ;) ) please let me know!

Another helpful tip about this recipe is in the parchment paper. I HATE trying to get parchment paper to stay or to keep it's shape when pouring in batter. To do so is an art form...one i am still trying to perfect. But  I have found it helpful to fold the sides to help it keep its shape, and just tape it to the outer edge of the pan until you pour in the batter (just don't forget to remove the tape!) It really does make a huge difference.

But without further ado.......drum roll please!!!!

***I forgot to take a picture when they were done!!!! WHOOPS!

Red Velvet Brownies

1/2 C. of room temperature butter
1 1/2 C. Sugar
2 Eggs
2 tsp. Vanilla
1 1/4 C. Flour
1/4 tsp. salt
3 Tbs. Cocoa Powder
2 Tbs. Red Food Coloring

White Chocolate Icing (optional...but necessary)

1/2 C. Room Temperature Butter
2 1/2 C. Powdered Sugar
1 tsp. Vanilla
4 Oz. White Chocolate
1-2 Tbs. milk

Step 1: Preheat the oven to 350 degrees, and either line a baking pan with parchment paper or grease and flour it. (**If bringing to a party I recommend the parchment paper it makes it easier to cut clean squares)

Step 2: In a small bowl mix the cocoa powder, food coloring, and 1 tsp. of vanilla to form a paste like mixture. 

Step 3: In a larger bowl cream the butter and sugar until light and fluffy!!! (**"IT'S SO FLUFFFFYYYYYYY" - I love Despicable Me, what a great movie!) Add the eggs one at at time and then the rest of the vanilla. Beat in your paste mixture, and then SLOWLY add the flour and salt.

Step 4: Pour into your prepared pan and bake for 25-30 minutes. DO NOT ICE THEM UNTIL COMPLETELY COOLED!!!!

Step 5: Melt the white chocolate (**You can find instructions on the package or ask me!) then set it aside. Then cream the butter and sugar until light and fluffy again. add the vanilla, and then slowly start adding the powdered sugar. When mixed in add the white chocolate. Finally add just tiny bits of milk a time until you reach the desired consistency. (**If you over do it just add more powdered sugar) Then you can ice them and eat up!

If you gain 20 pounds because you can't stop eating this...don't blame me! I tried to warn you